Setting up a robust development environment tailored for Laravel on a Windows machine can be a daunting task, especially when aiming for speed and efficiency. However, fear not, as this guide is here to assist you in streamlining the process. By harnessing the power of Windows Subsystem for Linux (WSL), I’ll walk you through the steps to establish a swift and seamless Laravel development environment on your Windows system. Whether you’re a seasoned developer or just diving into the Laravel framework, this comprehensive tutorial will pave the way for smoother development workflows, allowing you to focus on what truly matters—building exceptional web applications. Let’s embark on this journey to harness the full potential of Laravel development on your Windows machine!
WSL
Make sure your Windows version Windows 10, Version 2004 or higher(Build 19041 or higher) or checkout WSL manual installation steps for older versions.
You can now install everything you need to run WSL with a single command. Open PowerShell or Windows Command Prompt in administrator mode by right-clicking and selecting “Run as administrator”, enter the wsl —install command, then restart your machine.
# This command will install wsl and ubuntu distro in wsl
wsl --install
This command will enable the features necessary to run WSL and install the Ubuntu distribution of Linux.
The above command only works if WSL is not installed at all. If you run wsl --install and see the WSL help text, please try running wsl --list --online to see a list of available distros and run wsl --install -d <DistroName> to install a distro.
# List distributions available.
wsl --list --online

# Install Distribution
wsl --install -d Ubuntu-22.04
After the installation is finished you will be prompted to create a user account and password for your newly installed Linux distribution.
Post Install
Congratulations! now you have a Linux environment inside of your windows machine. Now to run the distro you can type the command below in your PowerShell.
wsl -d Ubuntu-22.04Once you are in the Linux environment first thing to do is to update the system.
sudo apt-get updateTools and Utils
Now we are ready to start setting up our Linux development environment. Lets start with installing some useful tools and utilities
Utilities
sudo apt-get install ca-certificates apt-transport-https software-properties-commonTools
sudo apt install git curl openssl wget micro gnupg2 fzf jq unzip zipPHP
Install PHP, phpMyAdmin and extensions required for Laravel. If you don’t require php8.3 then use the default php8.1 by only using the last command and replace php8.3 with PHP like - sudo apt-get install php php-cli php-common.
# Add Ondrej's PPA for php8.3
sudo add-apt-repository ppa:ondrej/php # Press enter when prompted.
sudo apt-get update
sudo apt-get install php8.3 php8.3-cli php8.3-common
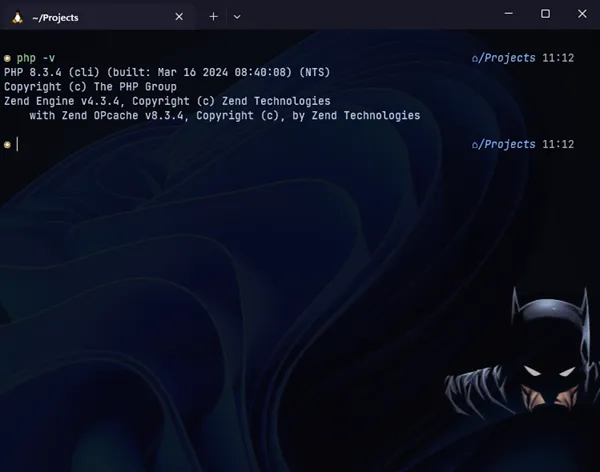
To check the version of PHP installed use the command: php -v
php -v
Install required extensions by replacing php* with your php version and [extention] with name of the extension.
# Sytax to install php extensions
sudo apt install php*-[extension]

# Install multiple extension
sudo apt install php8.3-{bcmath,curl,fpm,mysql,mbstring,xml,zip}
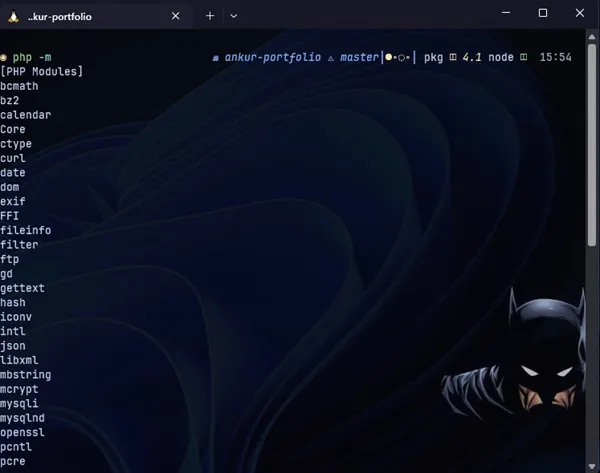
To check loaded PHP modules use the command: php -m
php -m
Composer
To install composer, execute these commands one by one:
curl -sS https://getcomposer.org/installer -o /tmp/composer-setup.php

HASH=`curl -sS https://composer.github.io/installer.sig`

php -r "if (hash_file('SHA384', '/tmp/composer-setup.php') === '$HASH') { echo 'Installer verified'; } else { echo 'Installer corrupt'; unlink('composer-setup.php'); } echo PHP_EOL;"

sudo php /tmp/composer-setup.php --install-dir=/usr/local/bin --filename=composer
Add composer to PATH
export PATH="$HOME/.config/composer/vendor/bin:$PATH"Laravel
composer global require laravel/installerMYSQL
Install mysql and start the service
sudo apt install mysql-serverAfter the installation is finished we need to start the service, run mysql as root and change the root password for MySQL to password, or what ever you prefer :
sudo service mysql start
sudo mysql
ALTER USER 'root'@'localhost' IDENTIFIED WITH mysql_native_password BY 'mypassword';

CREATE USER 'ankur'@'localhost' IDENTIFIED WITH mysql_native_password BY 'mypassword';

CREATE DATABASE example
NGINX
sudp apt install nginxInstall Valet-Linux
Valet Linux is a Laravel development environment for Linux minimalists. No Vagrant, no /etc/hosts file. You can even share your sites publicly using local tunnels. Yeah, we like it too.
Valet Linux configures your system to always run Nginx in the background when your machine starts. Then, using DnsMasq, Valet proxies all requests on the “*.test”(default) domain to point to sites installed on your local machine.
composer global require cpriego/valet-linux

# go to root directory
cd

# create new directory for development
mkdir -p Projects/Laravel/Sites && cd Projects/Laravel/Sites

# Create new laravel project inside Sites directory
laravel new example

#install valet
valet install

# Park currect directory holding your laravel/php projects
valet park

# Change default TLD from .test to .localhost or .app
valet domain localhost

# To use HTTPS
valet secure example
We’ll now need to create a symbolic link from the phpMyAdmin files to Nginx’s document root directory. This will tell Nginx where PhpMyAdmin files are and how to serve them!
sudo ln -s /usr/share/phpmyadmin /var/www/html/phpmyadmin

cd /var/www/html/phpmyadmin

# Serve a single site in a directory and not the entire directory.
valet link
Now we can access phpMyAdmin at phpmyadmin.localhost and our Laravel project at example.localhost or project_name.localhost.
IDE
This could be a personal choice, you can use VSCODE or NVIM. or any other IDE you prefer.
VSCODE
Install VSCODE for windows if you don’t already have it installed we will also need the WSL extension, Learn more.
Optional goodies
NVIM
# Neovim stable
sudo apt install neovim
To use the latest version of neovim we will have to add the unstable version PPA.
sudo add-apt-repository ppa:neovim-ppa/unstable
sudo apt-get update

sudo apt-get install neovim
Terminal (Optional)
This is completely optional In this part we are going to pimp our terminal to look amazing and less boring since we’ll be inside the terminal most of the time.
ZSH (SHELL)
sudo apt install zsh zsh-autosuggestions zsh-syntax-highlightingMake zsh your default shell
chsh -s $(which zsh)OhMyZsh (Configuration manager for ZSH)
sh -c "$(curl -fsSL https://raw.githubusercontent.com/ohmyzsh/ohmyzsh/master/tools/install.sh)"Install plugins
- Autosuggestion plugin
- zsh-syntax-highlighting plugin
- zsh-fast-syntax-highlighting plugin
- zsh-autocomplete plugin
git clone https://github.com/zsh-users/zsh-autosuggestions.git $ZSH_CUSTOM/plugins/zsh-autosuggestions

git clone https://github.com/zsh-users/zsh-syntax-highlighting.git $ZSH_CUSTOM/plugins/zsh-syntax-highlighting

git clone https://github.com/zdharma-continuum/fast-syntax-highlighting.git ${ZSH_CUSTOM:-$HOME/.oh-my-zsh/custom}/plugins/fast-syntax-highlighting

git clone --depth 1 -- https://github.com/marlonrichert/zsh-autocomplete.git $ZSH_CUSTOM/plugins/zsh-autocomplete
Enable plugins by adding them to .zshrc.
# Open .zshrc
vim ~/.zshrc
#or
nano ~/.zshrc
Find the line which says plugins=(git) and replace that line with plugins=(git zsh-autosuggestions zsh-syntax-highlighting fast-syntax-highlighting zsh-autocomplete) and save the file. Reopen your terminal or source the .zshrc file.
source ~/.zshrcStarship Prompt
# Install Starship
curl -sS https://starship.rs/install.sh | sh

# Set up your shell to use Starship
eval "$(starship init zsh)"- Configure Starship
I will not go into details here, simply use the preset you like from the available ones or go nuts with the configuration. I will be using the Jetpack preset.
starship preset jetpack -o ~/.config/starship.toml-
Install nerd font
- Download a Nerd Font
- Unzip and copy to
~/.fonts - Run the command
fc-cache -fvto manually rebuild the font cache - Or paste the command below to install JetBrainsMono Nerd Font
sudo apt install wget fontconfig \
&& wget -P ~/.local/share/fonts https://github.com/ryanoasis/nerd-fonts/releases/download/v3.1.1/JetBrainsMono.zip \
&& cd ~/.local/share/fonts && unzip JetBrainsMono.zip && rm *Windows* && rm JetBrainsMono.zip && fc-cache -fv
Resources
- Best practices for setting up a WSL development environment
- Valet Linux
- Volta
- Docker
- Get started with Docker remote containers on WSL 2